I have to confess something. Sometimes I sketch for projects and after a while, every drawing in my sketchbook looks the same. The lines that I draw start to become a little too perfect. The result: rigid character illustrations without room for a spark of spontaneity. I’ve found a way to break free from that routine and make my characters “fresh” again. And I would like to tell you about that.
Analog vs. Digital sketching
I often sketch for assignments directly in Procreate on the iPad. The advantage of this is that I can send a clean sketch to the customer and that I can easily change things. Plus tapping with two fingers to go back a step in my drawing is also very easy.
But because of that convenience, I sometimes forget the advantages of analog working. Freehand on a sheet of cheap printing paper, you can draw new things more easily. You can also try something new faster with a quick scribble on paper, such as a thumbnail sketch. So that’s why I’ve been increasingly returning to analog work recently in the early stages of a new drawing.
But even with a regular pencil and paper, my sketch can start to look like a tight vector drawing. Sometimes I recognize that my characters are starting to look a bit too similar and that I want to make the pencil lines too neat. For me, the alarm bells go off when I start tapping twice on a piece of paper as if I was working in Procreate. That is the time to shake things up!
Cut and tear the paper
One of the things I love to do in my sketchbook is to create collages. This can be a tidy collage for which I like to use scissors (a blog about that later), but to get loose in my sketches I prefer to take it a bit more primitive. Just tearing paper.
The scissors are therefore a forbidden object in this process. Only tools allowed: cheap colored paper, a pencil, and a glue stick. Then I take a look at reference photos of an animal or object that I want to create. I try to include as many different photos as possible so that my illustration cannot be traced back to a photo. And then it is very simple: just tear!
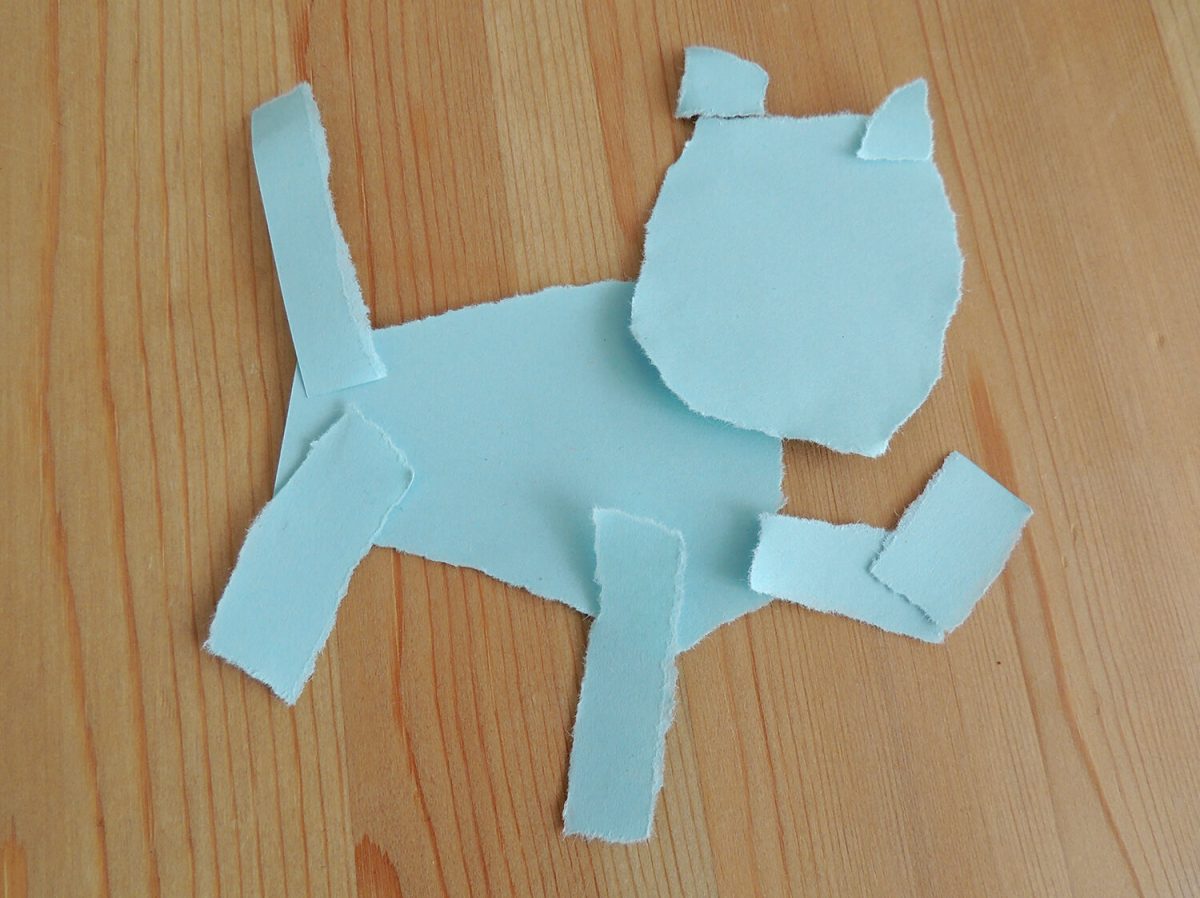
I only have one rule for myself for this: I am not allowed to make corrections. So, for example, I tear and paste a body and embrace every imperfection of that body. Then I paste a head, legs, ears, and so on. The result of the tearing is a colored silhouette.
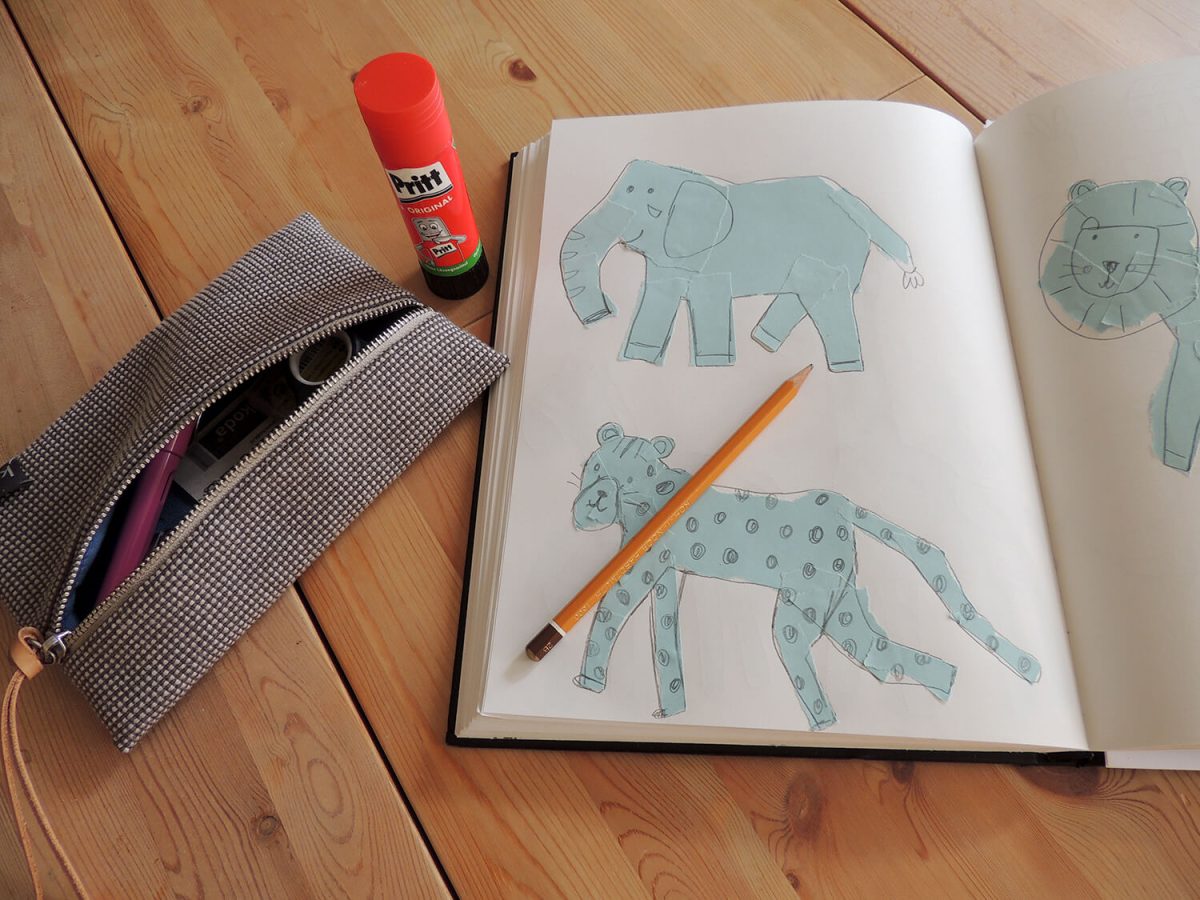
To make a character out of it I like to grab a pencil or ink pen. I draw on and around the silhouette to add details. After that, I can take a picture of the result to make a digital illustration of it.
Digital illustration
Those paper tear silhouettes are fun, but what can you do with them? No worries. These sketch versions are perfect to turn into a digital illustration. For that reason, I often use light blue paper, because I can easily remove that color from the sketch in Photoshop and work with a cleaner sketch (like a non-photo blue pencil).
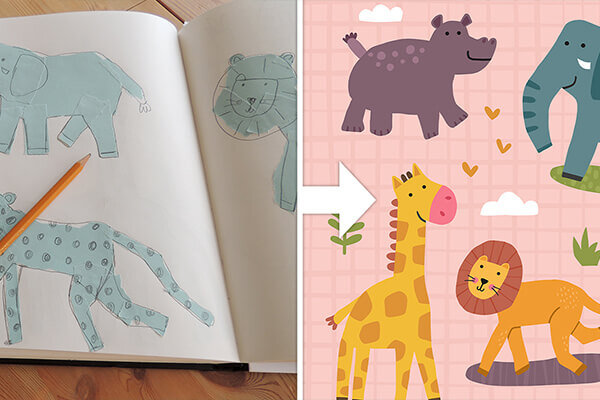
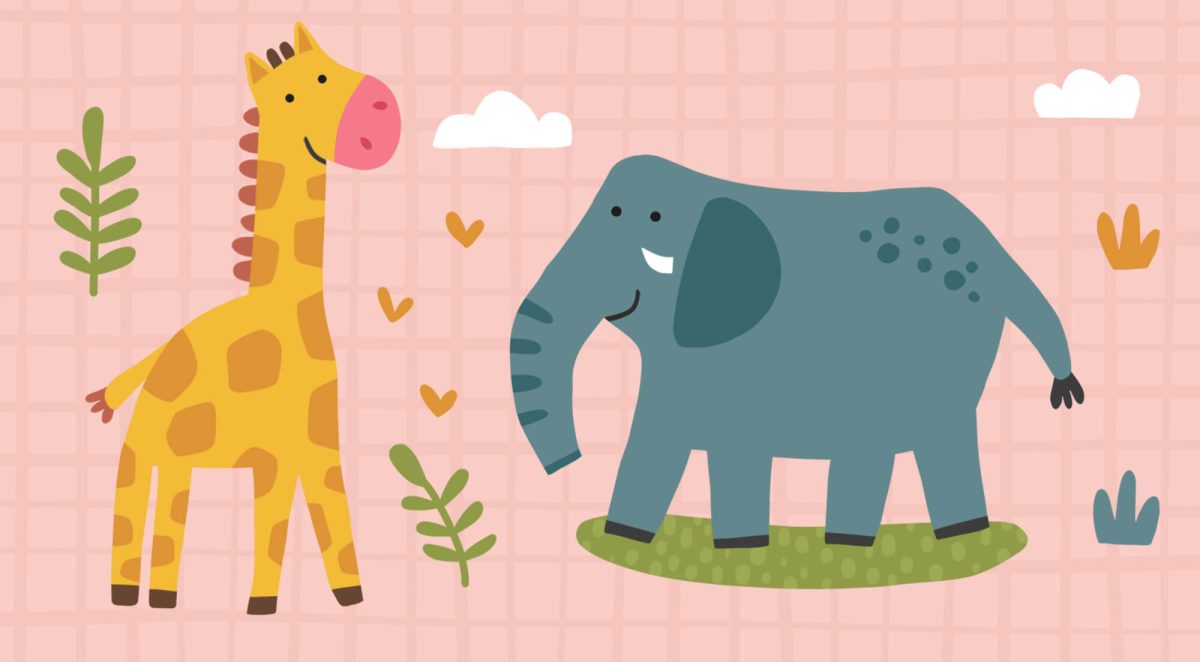
The sketches from the example have led to the illustration below.

The result is something I am happy with: cheerful and playful characters. A result that feels less predictable. Therefore this method feels perfect to get out of my ‘routine’.
Get in touch
Are you looking for fun characters for your next project? I would like to get in touch with you. Send me a message to get in touch.